
Table of Contents
Is there anything more disappointing than slicing into a home-cooked chicken breast, only to find a dry, rubbery center and lackluster flavor? At restaurants, chicken breast arrives juicy, tender, and packed with flavor—a far cry from the bland, chewy experiences too many of us have had in our own kitchens. But what if I told you that this restaurant magic isn’t a secret ingredient or expensive equipment, but a series of careful culinary steps you can absolutely master at home?
This comprehensive guide unlocks the professional techniques top chefs use to prepare chicken breast—with plenty of practical examples, helpful science, and detailed tips—empowering you to turn out perfectly cooked, restaurant-quality chicken breast every time.
Why is Restaurant Chicken Breast So Good?
Restaurants consistently deliver chicken breast that is moist, tender, and deeply flavorful. The culinary magic lies not in secrecy but in:
- Meticulous selection of high-quality poultry
- Proper trimming and even pounding for consistent thickness
- Flavor- and moisture-boosting marinades or brines
- Expert handling of heat and timing using chef-approved methods
- Respecting a crucial resting phase to retain juices
By understanding and applying these steps, you transform your chicken breast from everyday to extraordinary.
Step 1: Selecting the Perfect Chicken Breast
Your journey to restaurant-style chicken breast begins at the market. Not all chicken breasts are created equal, so take a moment to examine your selection:
- Size and Shape: Choose plump, even-sized breasts for consistent cooking.
- Freshness: Skip any with a strong odor, dull color, or excessive liquid in the packaging.
- Appearance: Look for firm, pale pink flesh without discolorations, bruising, or torn edges.
- Fat Content: Select breasts with minimal visible fat or gristle, as those can interfere with even texture and flavor.
- Organic/Free-Range (Optional): For the best possible flavor and texture, opt for organic or free-range chicken if budget allows.
Pro Tip: Evenly sized chicken breasts cook at a uniform rate, reducing your risk of overdone edges and undercooked centers.
Step 2: Prep for Success – Trimming and Pounding
1. Trim Excess Fat and Tendons
- Use a sharp paring knife to trim away any visible fat, cartilage, or tendon (the white, stringy part).
- This step creates a cleaner edge and more pleasant bite.
2. Pound to Even Thickness
- Place chicken between two pieces of plastic wrap (or parchment paper).
- Use a meat mallet (or rolling pin) to gently pound until breast is roughly 1/2 to 3/4 inch thick throughout.
- This ensures the meat cooks uniformly and stays moist throughout—no more dry, thin ends!
Tip: Don’t skip pounding. This step is crucial for restaurant consistency and prevents unexpected dryness.
Step 3: The Magic of Marination and Brining
Here’s where true restaurant-level transformation happens. While seasoning alone works, marinating or brining infuses flavor and, more importantly, moisture throughout the meat. Let’s break down both methods:
Marination: Flavor’s Best Friend
- Basic Formula: Fat (oil, yogurt), acid (lemon, vinegar), salt, and flavoring agents (herbs, garlic, spices).
- Marinate for at least 30 minutes; for deeper penetration, 2-24 hours is best.
Simple Lemon-Herb Marinade
- 1/4 cup olive oil
- 2 tbsp lemon juice
- 1 tsp salt
- 1 tsp chopped rosemary or thyme
- 1 minced garlic clove
- Black pepper to taste
Combine all ingredients and marinate chicken breasts in the fridge for up to 12 hours.
Chef’s secret: Always marinate in the refrigerator. Bring chicken out 30 minutes before cooking to come to room temperature for even cooking.
Brining: The Juiciness Guarantee
Brining involves soaking chicken breasts in a saltwater solution (sometimes with sugar and aromatics). The science: salt denatures proteins, allowing water and flavorings to be absorbed, resulting in juicy, flavorful meat even if cooked slightly over.
Basic Brine Solution Recipe
- 4 cups water
- 1/4 cup kosher salt
- 2 tbsp sugar
- 3-4 smashed garlic cloves
- 1 tbsp peppercorns
- Optional: sprigs of rosemary, thyme, or bay leaf
Dissolve salt and sugar in water. Add aromatics, cool, then submerge chicken for 30-90 minutes (no longer for boneless breasts—they get too salty and mushy otherwise!).
Why Brine?
Brining significantly increases moisture retention and guarantees tenderness—even if you overcook by a few degrees.
Dry Brining
If you’re short on time or fridge space, dry brining—simply salting your chicken breast evenly on both sides, then refrigerating uncovered for 1-2 hours—can produce fantastic results.
Try both! Marinate for a flavor boost, or brine for juiciness and foolproof tenderness.
Step 4: Mastering Restaurant Cooking Methods
You’ve chosen, prepped, and seasoned your chicken like a pro. Now comes the make-or-break moment: cooking.
Pan-Searing
- Best For: Quick meals, crisp golden exterior, strong flavor development (Maillard reaction!)
- Process: Use a heavy skillet (stainless steel or cast iron) and let it get hot before adding a thin film of oil and your chicken.
- Sear undisturbed for 3-5 minutes per side, depending on thickness. Finish in the oven (preheated to 375°F/190°C) for extra-thick breasts.
Don’t crowd the pan: Work in batches if necessary—steaming ruins the crispy crust!
Baking
- Best For: Larger quantities, hands-off cooking, sheet pan meals
- Process: Place breasts on a lightly oiled rack or lined tray. Bake at 400°F/205°C for 15-22 minutes, or until internal temp reaches 165°F/74°C.
- Monitor closely; overbaking is the #1 cause of dry chicken.
Poaching
- Best For: Super-moist, delicately flavored chicken—especially for salads, sandwiches, or shredding
- Process: Submerge breasts in barely simmering (not boiling!) liquid with seasoning and aromatics. Cook for 12–18 minutes until just cooked through.
Poached chicken makes dreamy cold cuts and never gets stringy, thanks to its gentle cooking method.
Sous Vide
- Best For: Consistently perfect results every time; home cooks seeking restaurant-level control and luxury
- Process: Vacuum-seal seasoned breasts and cook in a water bath at 140–150°F (60–65°C) for 1–2 hours. Sear briefly in a hot pan for a golden crust post-bath.
No matter the method—use a digital instant-read thermometer! This ensures you pull the chicken off the heat at precisely the right moment (about 160–162°F/71°C, as temp will rise to 165°F/74°C while resting).
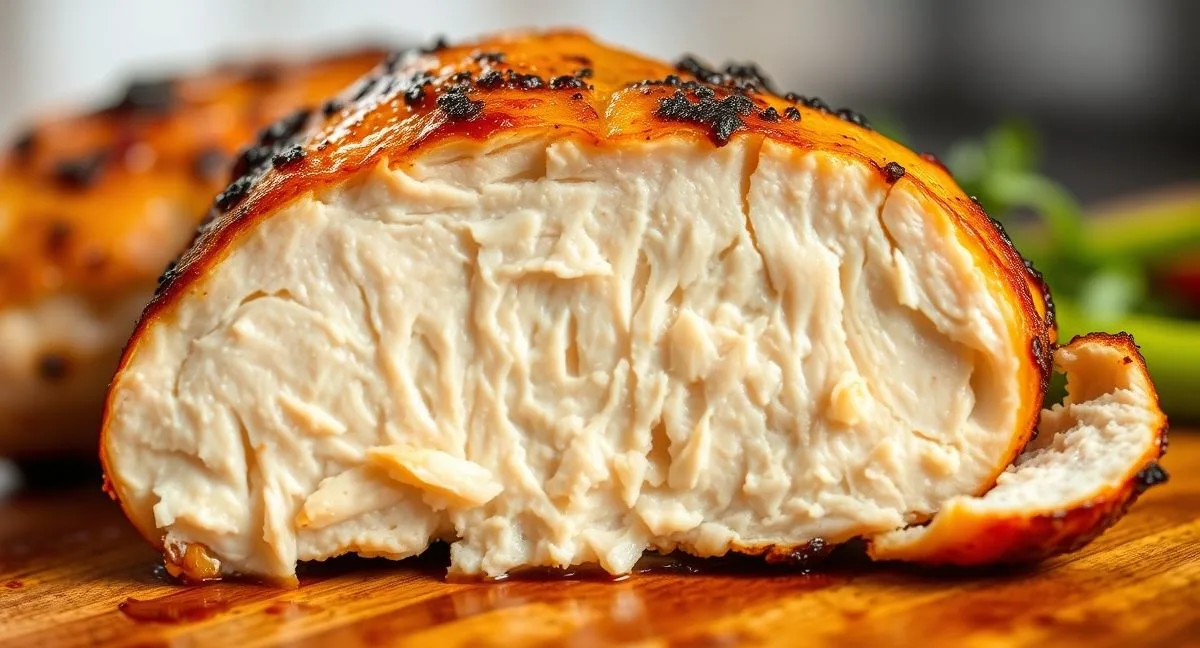
All About Resting: Why Patience Matters
Ever sliced into a chicken breast right off the stove or out of the oven—only to find all those glorious juices running out onto the cutting board? You’ve skipped a step even professionals sometimes neglect: resting.
- Rest chicken breasts under a loose tent of foil for 5–10 minutes post-cooking.
- This allows the proteins to relax and reabsorb juices, ensuring every bite is moist and flavorful instead of dry and stringy.
Patience pays off! A simple 5-minute rest can be the difference between bland and brilliant chicken breast.
Troubleshooting Your Chicken Breast
Dry, Rubbery, or Bland?
- Overcooked? Use a thermometer next time; pull chicken at 160–162°F and rest to reach 165°F.
- Boring flavor? Don’t skip marinating, dry brining, or a flavorful finishing sauce.
- Tough/grainy? Could be old or low-quality meat; try a longer marinade, gentle cooking, or sous vide.
Uneven Cooking?
- Pound to even thickness.
- Avoid sudden temperature changes or crowding the pan.
Chef’s Tips for Extra Flavor
- Add a finishing butter baste: In the last minute of cooking, add a tablespoon of butter, and baste chicken with it, along with garlic and herbs.
- Top with sauce: Try pan sauce (using fond and a splash of wine), a drizzle of chimichurri, or a squeeze of lemon juice for freshness.
- Try spice rubs: Mix smoked paprika, cumin, coriander, or your favorite blends for variety.
- Rest on a rack: After baking or searing, a rack preserves that lovely crust.
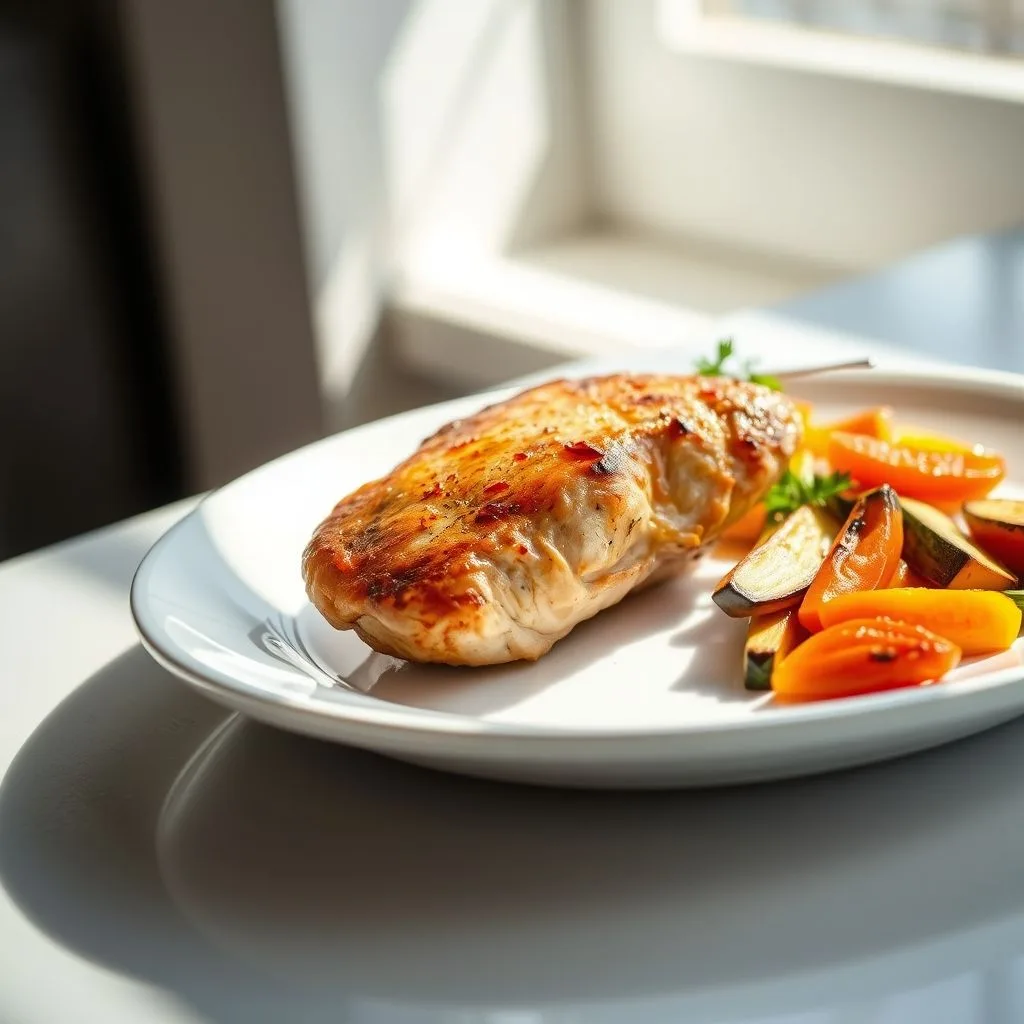
Recipe: Juicy Restaurant-Style Chicken Breast
Ultimate Restaurant-Style Chicken Breast
Ingredients:
- 2 boneless, skinless chicken breasts, trimmed and pounded to 3/4-inch thickness
- 2 tbsp olive oil, divided
- 1 tsp kosher salt
- 1/2 tsp ground black pepper
- 1/2 tsp garlic powder
- 1/2 tsp smoked paprika (optional)
- 1 tbsp butter
- 2 cloves garlic, smashed
- Fresh herbs (thyme, parsley, or rosemary), optional
Instructions:
- Pat chicken dry. Season both sides evenly with salt, pepper, garlic powder, and paprika.
- Heat 1 tbsp olive oil in a large skillet (preferably stainless or cast iron) over medium-high heat until shimmering but not smoking.
- Add chicken breasts; cook undisturbed for 4–5 minutes, until deep golden brown. Flip.
- Add butter, smashed garlic, and herbs (if using). Baste chicken with melted butter as it cooks the second side, about 3–4 minutes, or until internal temp reaches 160–162°F (71°C).
- Transfer chicken to a plate and loosely tent with foil. Rest for 5–10 minutes before slicing to allow juices to redistribute.
- Slice and serve with pan juices or your favorite sauce.
Notes:
- For extra juiciness, dry brine the chicken (salt both sides and refrigerate uncovered) for at least 1 hour before cooking.
- Try your favorite quick marinade for more flavor punch!
Common Questions and Answers (FAQ)
Can I use frozen chicken breasts?
Yes, but make sure breasts are fully thawed and patted dry before marinating, brining, or cooking. Excess moisture leads to steaming, not browning.
Do I need to rinse chicken before cooking?
No—rinsing spreads bacteria around your sink. Pat dry with paper towels instead.
Is brining safe if I’m short on time?
Even a quick 20–30 minutes in brine or seasoning with salt gives noticeable benefits!
What’s the best way to store cooked chicken breast?
Cool completely, then refrigerate in an airtight container for up to 3–4 days. Reheat gently, covered, with a splash of broth or sauce.
Can this technique be used for bone-in or skin-on chicken?
Yes! Adjust cooking times accordingly; bone-in pieces take longer, and skin-on yields extra flavor and protects against drying out.
Final Thoughts: Unlocking Restaurant Perfection
Restaurant-level chicken breast is within your reach—all it takes is a careful, attentive approach to selection, preparation, flavor-building, and the science of heat. Invest those few extra steps: buy good chicken, pound it evenly, brine or marinate, cook gently and to temperature, and always, always rest before serving.
Practice these techniques and soon you’ll never fear serving dry chicken breast again. Instead, you’ll proudly plate up tender, juicy, restaurant-worthy chicken—whether as the star of an elegant entrée or the foundation for casseroles, sandwiches, and salads.