
Table of Contents
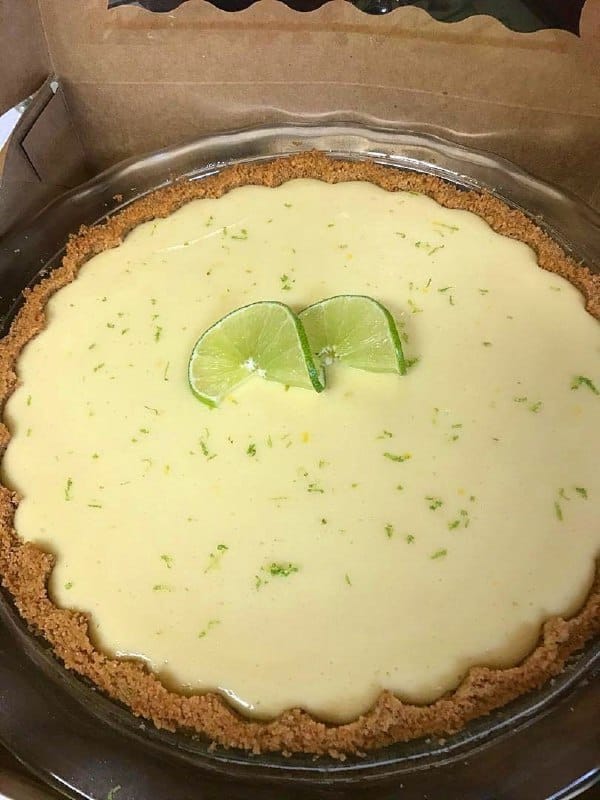
There are desserts that whisper sunshine, and there are pies that invite you to slow down, slice a piece, and savor a moment. This Key Lime Pie, perched on a buttery graham cracker crust, does both. It’s a dessert that holds the warmth of Florida’s sun-drenched days and the cool, clean tang of lime balanced with a smooth, creamy filling. It’s not just a recipe; it’s a little celebration of citrus, a reminder that simple ingredients—when treated with care—can yield something extraordinary.
Why This Pie Is Special
Key lime pie is a beloved staple in many kitchens, with a storied history tied to the Florida Keys, where tiny, tart limes have been grown for generations. The essence of the dessert is refreshingly straightforward: a crisp crust, a bright, custard-like filling, and a chill that makes every bite feel both creamy and zesty. The graham cracker crust in this version adds a toasty, honeyed note that perfectly complements the lime’s brightness, while also providing a sturdy base that holds up to the silky filling without becoming soggy. If you’ve ever worried about a pie filling that runs or a crust that crumbles, you’re in the right place—this approach aims for balance, texture, and a finish that begs to be shared with friends and family.
Whether you’re planning a weeknight treat or a celebratory dessert, this Key Lime Pie is flexible, forgiving, and reproducible. It relies on a few kitchen-friendly steps—no temperamental eggs, no fragile spotlight—yet it yields a pie that tastes like sunshine and comfort in every bite.
The Crust: Graham Cracker Magic
The crust is more than a vessel; it’s a flavor partner. A well-made graham cracker crust brings a gentle sweetness and a toasty undertone that contrasts beautifully with the tart filling. In this recipe, 1 1/2 cups graham cracker crumbs, 3 tablespoons sugar, 6 tablespoons melted unsalted butter, and a pinch of salt come together to form a compact, cohesive crust that holds its shape when you slice into the pie.
Here are a few notes on crust craftsmanship:
- Crumbs matter: The graham crackers should be finely crushed so the crust presses into all the nooks of the pie plate, creating a solid, even layer.
- Butter matters: Melted butter helps the crumbs bind. The salt in the crust underscores the lime’s acidity while balancing the sweetness.
- Baking for structure: A brief bake at 350°F (175°C) for about 8 minutes helps set the crust and extract a gentle toasty aroma. The crust firming up in the oven means it won’t crumble when you slice the pie after chilling.
To perform the crust perfectly, press the mixture evenly into a 9-inch pie dish, using the bottom of a measuring cup or the flat side of a spoon to compact and smooth. A well-packed crust will remain intact with clean slices, and that clean cut is part of the joy of serving this pie.
The Filling: Silky, Bright, and Easy to Love
The heart of Key lime pie is its filling—a simple, egg-yolk-forward custard that relies on the tang of lime juice, the perfume of lime zest, and the creamy body of sweetened condensed milk. Here, you’ll use four large egg yolks, 14 ounces (396 g) of sweetened condensed milk, 3/4 cup fresh lime juice, 1 tablespoon lime zest, and a pinch of salt. The result is a custard that sets gently and remains creamy rather than chalky or rubbery.
The steps are straightforward, but a few small decisions can influence the texture and taste you end up with:
- Fresh juice and zest: Fresh lime juice and zest bring essential oils and bright aromatics that bottled juice can’t replicate.
- Yolk handling: Whisking the yolks first and then tempering with the condensed milk helps maintain a smooth, uniform texture without lumps or grains.
- Salt: A pinch of salt brightens the lime and enhances the overall balance, preventing the pie from tasting flat.
When you whisk the yolks, you’re beginning the custard’s magic. The condensed milk lends sweetness and body, and the lime juice does the rest—its acidity is what makes the filling set with a delicate jiggle rather than becoming dense or stiff. The zest is the final flourish, giving tiny bursts of citrus perfume in every bite.
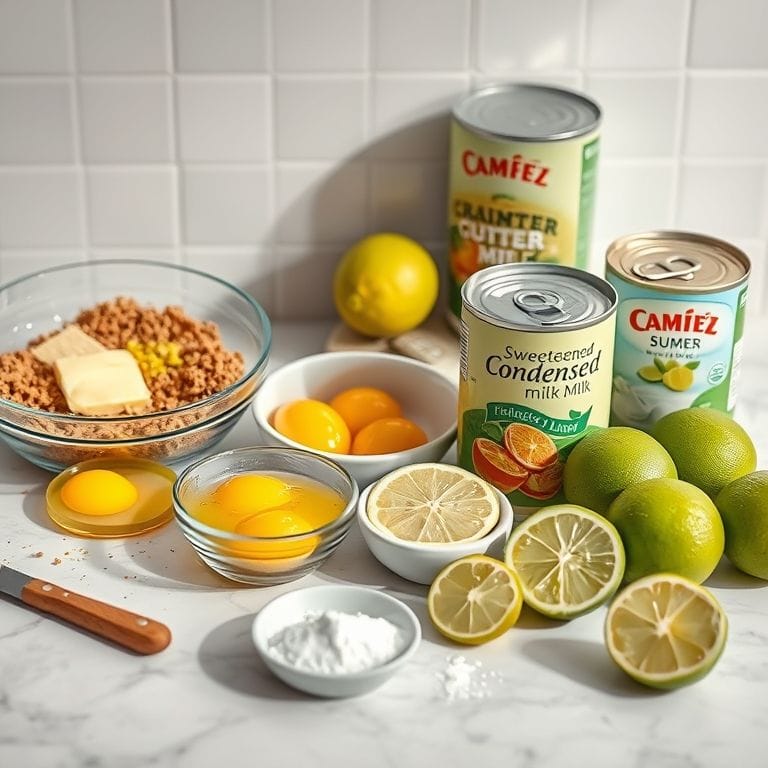
Ingredients List (For Your Shopping and Mise en Place)
Crust
- 1 1/2 cups graham cracker crumbs
- 3 tablespoons granulated sugar
- 6 tablespoons unsalted butter, melted
- Pinch of salt
Filling
- 4 large egg yolks
- 14 oz (396 g) sweetened condensed milk
- 3/4 cup fresh lime juice
- 1 tablespoon lime zest
- Pinch of salt
Finish and Serving
- Lime wedges, for garnish
- Extra lime zest, for garnish
- Optional whipped cream for serving
Notes: If you don’t have fresh limes or lime zest on hand, you can substitute bottled lime juice in a pinch, but the zest’s aromatic oils really elevate the pie’s brightness. If you’re watching gluten, you can explore gluten-free graham crackers or an almond flour crust as an alternative, though the texture will differ slightly.
Step-by-Step: How to Make It (With Timing Cues)
Step 1: Prepare the crust
Preheat your oven to 350°F (175°C). In a medium bowl, combine the graham cracker crumbs, sugar, and a pinch of salt. Stir in the melted butter until the mixture looks like wet sand and holds together when pressed between your fingers. The goal is a cohesive, slightly clumpy texture rather than loose crumbs.
Press the crust firmly into a 9-inch pie dish, guiding it up the sides a bit for a gentle edge that won’t crumble when sliced. Use the bottom of a measuring cup or a flat spatula to press and compact evenly. Bake for about 8 minutes, just until the crust looks set and fragrant. Remove from the oven and cool on a rack while you prepare the filling.
Step 2: Make the filling
In a large bowl, whisk the four egg yolks until they’re pale and slightly thickened. This helps ensure a smooth custard. Then whisk in the sweetened condensed milk until fully combined. The mixture will look pale and creamy, with a glossy surface.
Whisk in the 3/4 cup fresh lime juice and the tablespoon of lime zest. Add a pinch of salt. The lime juice will begin to tint the mixture with a pale green, and the zest will release its fragrant oils, giving the filling a lively aroma. Whisk until everything is evenly incorporated and smooth. Do a quick check for any lumps; if you see a stray bit of zest or a small lump of yolk, whisk a bit longer or strain through a fine-mesh sieve into the crust (optional but helpful for a perfectly smooth texture).
Step 3: Bake the filling
Pour the lime filling into the cooled crust. Bake at 350°F (175°C) for about 15 minutes, or until the filling has set with a slight jiggle in the center. The edges should be firm, and you shouldn’t see a lot of movement when you gently shake the pie dish. It will continue to firm up as it cools, so don’t overbake.
Step 4: Cool and chill
Allow the pie to cool to room temperature on a rack, which helps prevent condensation from forming on the surface. Once cool, refrigerate for at least 4 hours, or ideally overnight. Chilling is essential for the filling to set fully and slice cleanly. If you try to cut into it before it’s properly chilled, you may end up with cracks or a runnier texture.
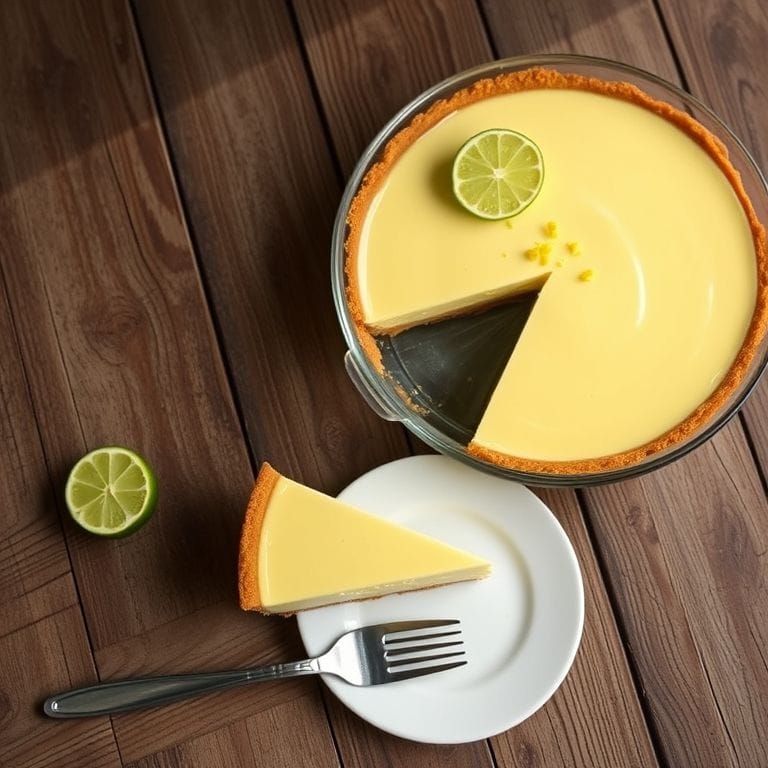
Step 5: Serve
Slice the pie into wedges and serve chilled. Garnish with lime wedges and a little extra zest for a pop of color and fragrance. A dollop of whipped cream is a lovely optional finish for those who enjoy a creamier, lighter topper. For a more adult twist, a light drizzle of lime syrup or a micro-leaf garnish can add visual appeal and a subtle herbaceous note.
Cooling, Serving, and Storage: Getting It Right
Patience is a virtue in pie-making, especially with citrus custards. The chilling period—four hours or overnight—not only helps the filling set but also allows flavors to mingle and deepen. When you’re ready to serve, you’ll find a slice with clean edges, a satisfying jiggle in the center, and a bright, inviting aroma that makes the whole room smell like a sunny afternoon.
Storage is straightforward: cover the pie with plastic wrap or store it in a loose lid to prevent absorbing odors from the fridge. It will keep well for up to 3–4 days; the texture will remain pleasant, though the filling will firm up more with longer chilling. If you’re planning ahead for a party, you can assemble the crust and filling a day in advance and bake the pie on the day you plan to serve it, keeping in mind the 15-minute bake window for the filling.
Garnish options are plentiful. A fresh lime wheel on each slice is classic, but you can also add a sprig of mint for color or a delicate sprinkle of finely grated lime zest for a more pronounced citrus aroma. For an extra touch of whimsy, consider candied lime peels arranged around the edge of the plate, which provide both color and a gentle citrus sweetness.
Tips, Troubleshooting, and Common Questions
Even with a straightforward recipe, you may run into a few bumps. Here are some practical tips to help you navigate common issues and ensure a flawless pie.
- Lumps in the filling: If you notice lumps after whisking, whisk a bit longer, or strain the filling through a fine-mesh sieve into the crust before baking. A quick pass through a sieve is a tiny extra step that yields noticeably smoother custard.
- Crust too soft: If the crust seems underbaked or too soft after cooling, give it a few more minutes in the oven next time, or press the crust back into shape and bake for a few extra minutes during the initial bake. Let it cool completely before adding the filling to ensure it holds its form.
- Filling not setting: If the center seems runny after the 15-minute bake, it may need a few more minutes, or your oven may run cool. If you suspect oven temperature calibration, use an oven thermometer to confirm. Don’t bake for too long, or you’ll end up with a grainy texture. If needed, return to the oven in short increments (2–3 minutes) until the center is just barely set.
- Cracks after chilling: Cracks can appear if the pie cools too quickly or is overbaked. Ensure a gentle bake and a gradual cooling. If a crack does appear, you can cover it with a light layer of whipped cream or top with lime zest to disguise it and maintain visual appeal.
- Flavor balance: If the lime flavor feels too sharp, you can balance by adding a touch more condensed milk or a pinch more zest. Conversely, if you find it too sweet, a little extra lime juice can help. The key is to maintain harmony between tartness, sweetness, and creaminess.
Variations and Adaptations: Personalizing Your Key Lime Pie
While the classic version shines, you might enjoy exploring a few tasteful variations. Here are some ideas, each designed to complement the traditional base without straying too far from what makes this pie special.
Alternative Crusts
- : Add an extra tablespoon of granulated sugar and replace a portion of the graham crumbs with finely shredded coconut for a tropical aroma. Toast the coconut lightly to intensify flavor.
- Almond crust: Use almond flour or finely ground almonds mixed with the graham cracker crumbs for a nutty edge. You may need a touch more butter to bind the crust.
- Gluten-free crust: Use gluten-free graham crackers or a swap like almond flour and a hint of oat flour to keep structure without gluten.
Filling Tweaks
- Post-bake tang: If you enjoy a lighter tang, reduce lime juice by a couple of tablespoons and balance with a pinch more zest and perhaps an extra yolk for the custard’s body.
- Infused lime: Infuse the lime juice with a thin strip of lime zest for 15–20 minutes, then strain before using. The infusion adds depth without overpowering the lime aroma.
Additional Garnishes
- A dollop of whipped cream with a drizzle of lime syrup creates a dessert that feels restaurant-polished.
- A light dusting of finely grated lime zest, a mint leaf, or edible flowers can elevate the presentation for a warmer, springtime table.
Make-Ahead Schedule: How to Plan Ahead
The beauty of this pie lies in its make-ahead quality. Planning ahead takes the stress out of entertaining and ensures you can focus on finishing touches the moment guests arrive.
- Day before or morning of: Prepare the crust with the butter, bake, and cool completely. This is a good time to zest the limes and squeeze the juice so the filling is ready to assemble later.
- Same day, during the afternoon: Whisk the egg yolks, blend in the condensed milk, lime juice, zest, and salt. Pour into the crust and bake for 15 minutes. Let the pie cool completely on a rack.
- Evening or day of serving: Refrigerate for at least 4 hours or overnight. Garnish with lime wedges and zest just before serving to maintain a bright appearance and aroma.
For parties, you can prepare multiple pies using this method, or, if you’re serving a crowd, consider making a couple of smaller pies or tartlets to ensure everyone gets a slice with clean edges and a well-formed crust.
A Note on Nutrition and Flavor Philosophy
This Key Lime Pie is a celebration of balance: tart, sweet, creamy, and crisp all at once. Nutrition-wise, the pie is rich, especially because of the butter and condensed milk. If you’re mindful of sweetness and fat, portion control and occasional lighter toppings (such as whipped cream with less sugar) can help. Remember that the joy of this pie is not in perfection but in the way its flavors refresh the palate with every bite—the brightness of lime cutting through the smooth custard, the crust providing a comforting crunch, and the chill tying it all together.
Final Thoughts: Why You’ll Keep Coming Back
There is something distinctly comforting about Key lime pie—a dessert that feels both casual and celebratory, perfect for a family dinner or a weekend gathering. The combination of a graham cracker crust and a zesty lime filling creates a familiar, inviting profile that almost anyone can appreciate. The technique is approachable, the steps are clear, and the result is a pie that looks as illustrious as a café dessert but can be made in your own home kitchen with a handful of pantry staples. In short, this is the kind of dessert that earns a place in your rotating repertoire—one that you’ll pull out for birthdays, anniversaries, or simply when you want to remind yourself that doing a few things well can bring a lot of joy to the table.
With patience, a few quality ingredients, and a mindful approach to timing, you’ll produce a Key Lime Pie that exudes sunshine even on the cloudiest days. And when you serve it with a smile, you’re not just serving pie—you’re serving a moment of delight that lingers on the palate and in the memory.
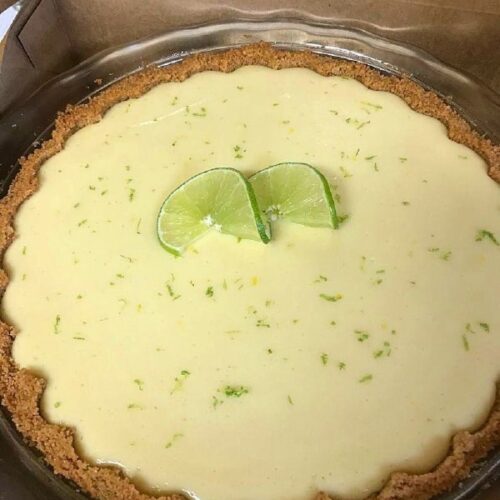
Key Lime Pie
Equipment
- 9-inch Pie Dish
- Mixing Bowls
- Whisk
Ingredients
Crust
- 1.5 cups graham cracker crumbs
- 3 tbsp sugar
- 6 tbsp unsalted butter melted
- 1 pinch salt
Filling
- 4 large egg yolks
- 14 oz (396 g) sweetened condensed milk
- 0.75 cup fresh lime juice
- 1 tbsp lime zest
- 1 pinch salt
Garnish
- lime wedges
- extra lime zest
Instructions
- Preheat oven to 350°F (175°C).
- Make the crust: In a bowl, mix graham cracker crumbs, 3 tbsp sugar, and a pinch of salt. Stir in the melted butter until the crumbs are evenly moistened. Press the mixture firmly into the bottom and up the sides of a 9-inch pie dish.
- Bake the crust for 8 minutes. Remove from the oven and let it cool completely.
- Make the filling: In a medium bowl, whisk the egg yolks until slightly thickened. Whisk in the sweetened condensed milk until smooth. Add the fresh lime juice, 1 tbsp lime zest, and a pinch of salt. Whisk until the mixture is well combined and smooth.
- Pour the filling into the cooled crust.
- Bake at 350°F (175°C) for about 15 minutes, or until the filling is set (the center should jiggle slightly when shaken).
- Let the pie cool to room temperature on a wire rack, then refrigerate for at least 4 hours, or preferably overnight, until completely chilled and set.
- Serve chilled, garnished with lime wedges and extra zest.